Guest post by Chandresh “C.K.” Kedhambadi

More and more we are asked, “how do I take photos if I can’t go outside?” There are a host of reasons it might be more comfortable to enjoy the aurora through a window, and even some situations where it’s an advantage: for example, flying above the clouds. With that in mind we are grateful to Aurorasaurus Ambassador and professional photographer Chandresh “C.K.” Kedhambadi for this guest post, in which he helps equip you with the skills to photograph aurora through a plane window, or even your windows at home.
Seeing the Northern Lights for the first time is a moment that permanently recalibrates your sense of wonder. What begins as quiet disbelief quickly turns into fascination, and then into an almost irresistible urge to understand what you are witnessing—how the lights form, why they move, and when they return. That first encounter often marks the start of a journey: learning the science behind the aurora, chasing it across landscapes and seasons, and eventually learning to photograph it, not just to record its beauty, but to honour the feeling of awe that first night ignited.

After capturing a few truly mesmerizing aurora images, I as an aurora chaser quickly realized that the greatest challenge is not the aurora itself, but the relentless presence of clouds. Nights of intense solar activity can be lost entirely to overcast skies, turning patience into frustration. The imagination naturally drifts upward—to a place above the weather, where clouds no longer dictate the outcome and the aurora dances freely below. At 35,000 feet, the Northern Lights are no longer a distant horizon phenomenon—they surround you. This rare perspective challenges both technical skill and creative instinct, demanding quick decisions, patience, and a deep understanding of light, motion, and timing. From above the clouds, the aurora is not just observed—it is experienced as a living, dynamic force painted across the planet. Yet from that vantage point, a new challenge emerges: photographing the Northern Lights from a moving aircraft, where speed, vibration, window reflections, and constantly shifting light demand precision, adaptability, and an entirely new way of seeing the aurora.
My first experience photographing the aurora from an airplane came unexpectedly on my return journey from The Aurora Summit conference in 2023. After two and a half days immersed in inspiring presentations, science, and storytelling around the Northern Lights, I was looking to catch up on sleep on my flight back home to Calgary from Minneapolis. With my rental car returned and airline check-in already done, I casually checked the aurora data out of habit—only to realize that G1 geomagnetic storm conditions were in effect. In that quiet moment at the gate, fatigue gave way to anticipation, and I knew the journey home might offer one more unforgettable aurora experience, this time from above the clouds. As the realization set in, excitement quickly turned into anxiety when I saw my assigned seat—an aisle seat on the left side of the aircraft, the worst possible position for an aurora opportunity. I knew that a north-facing window seat on the right side, ideally just behind the wing, would offer the best chance. Without hesitation, I rushed to the Delta counter and explained my situation, hoping for a last-minute change. When the agent obliged and reassigned me to a right-side window seat, the sense of relief was immediate—it felt as though the night had just aligned in my favour.
Choosing the Right Seat – Best seats are just behind the wing, not over it
Choosing the right seat is one of the most important factors in successfully photographing the Northern Lights from an airplane. A window seat on the north-facing side of the aircraft is essential, as Northern Lights typically appear toward the polar horizon—this usually means the left side on eastbound flights and the right side on westbound flights in the Northern hemisphere.
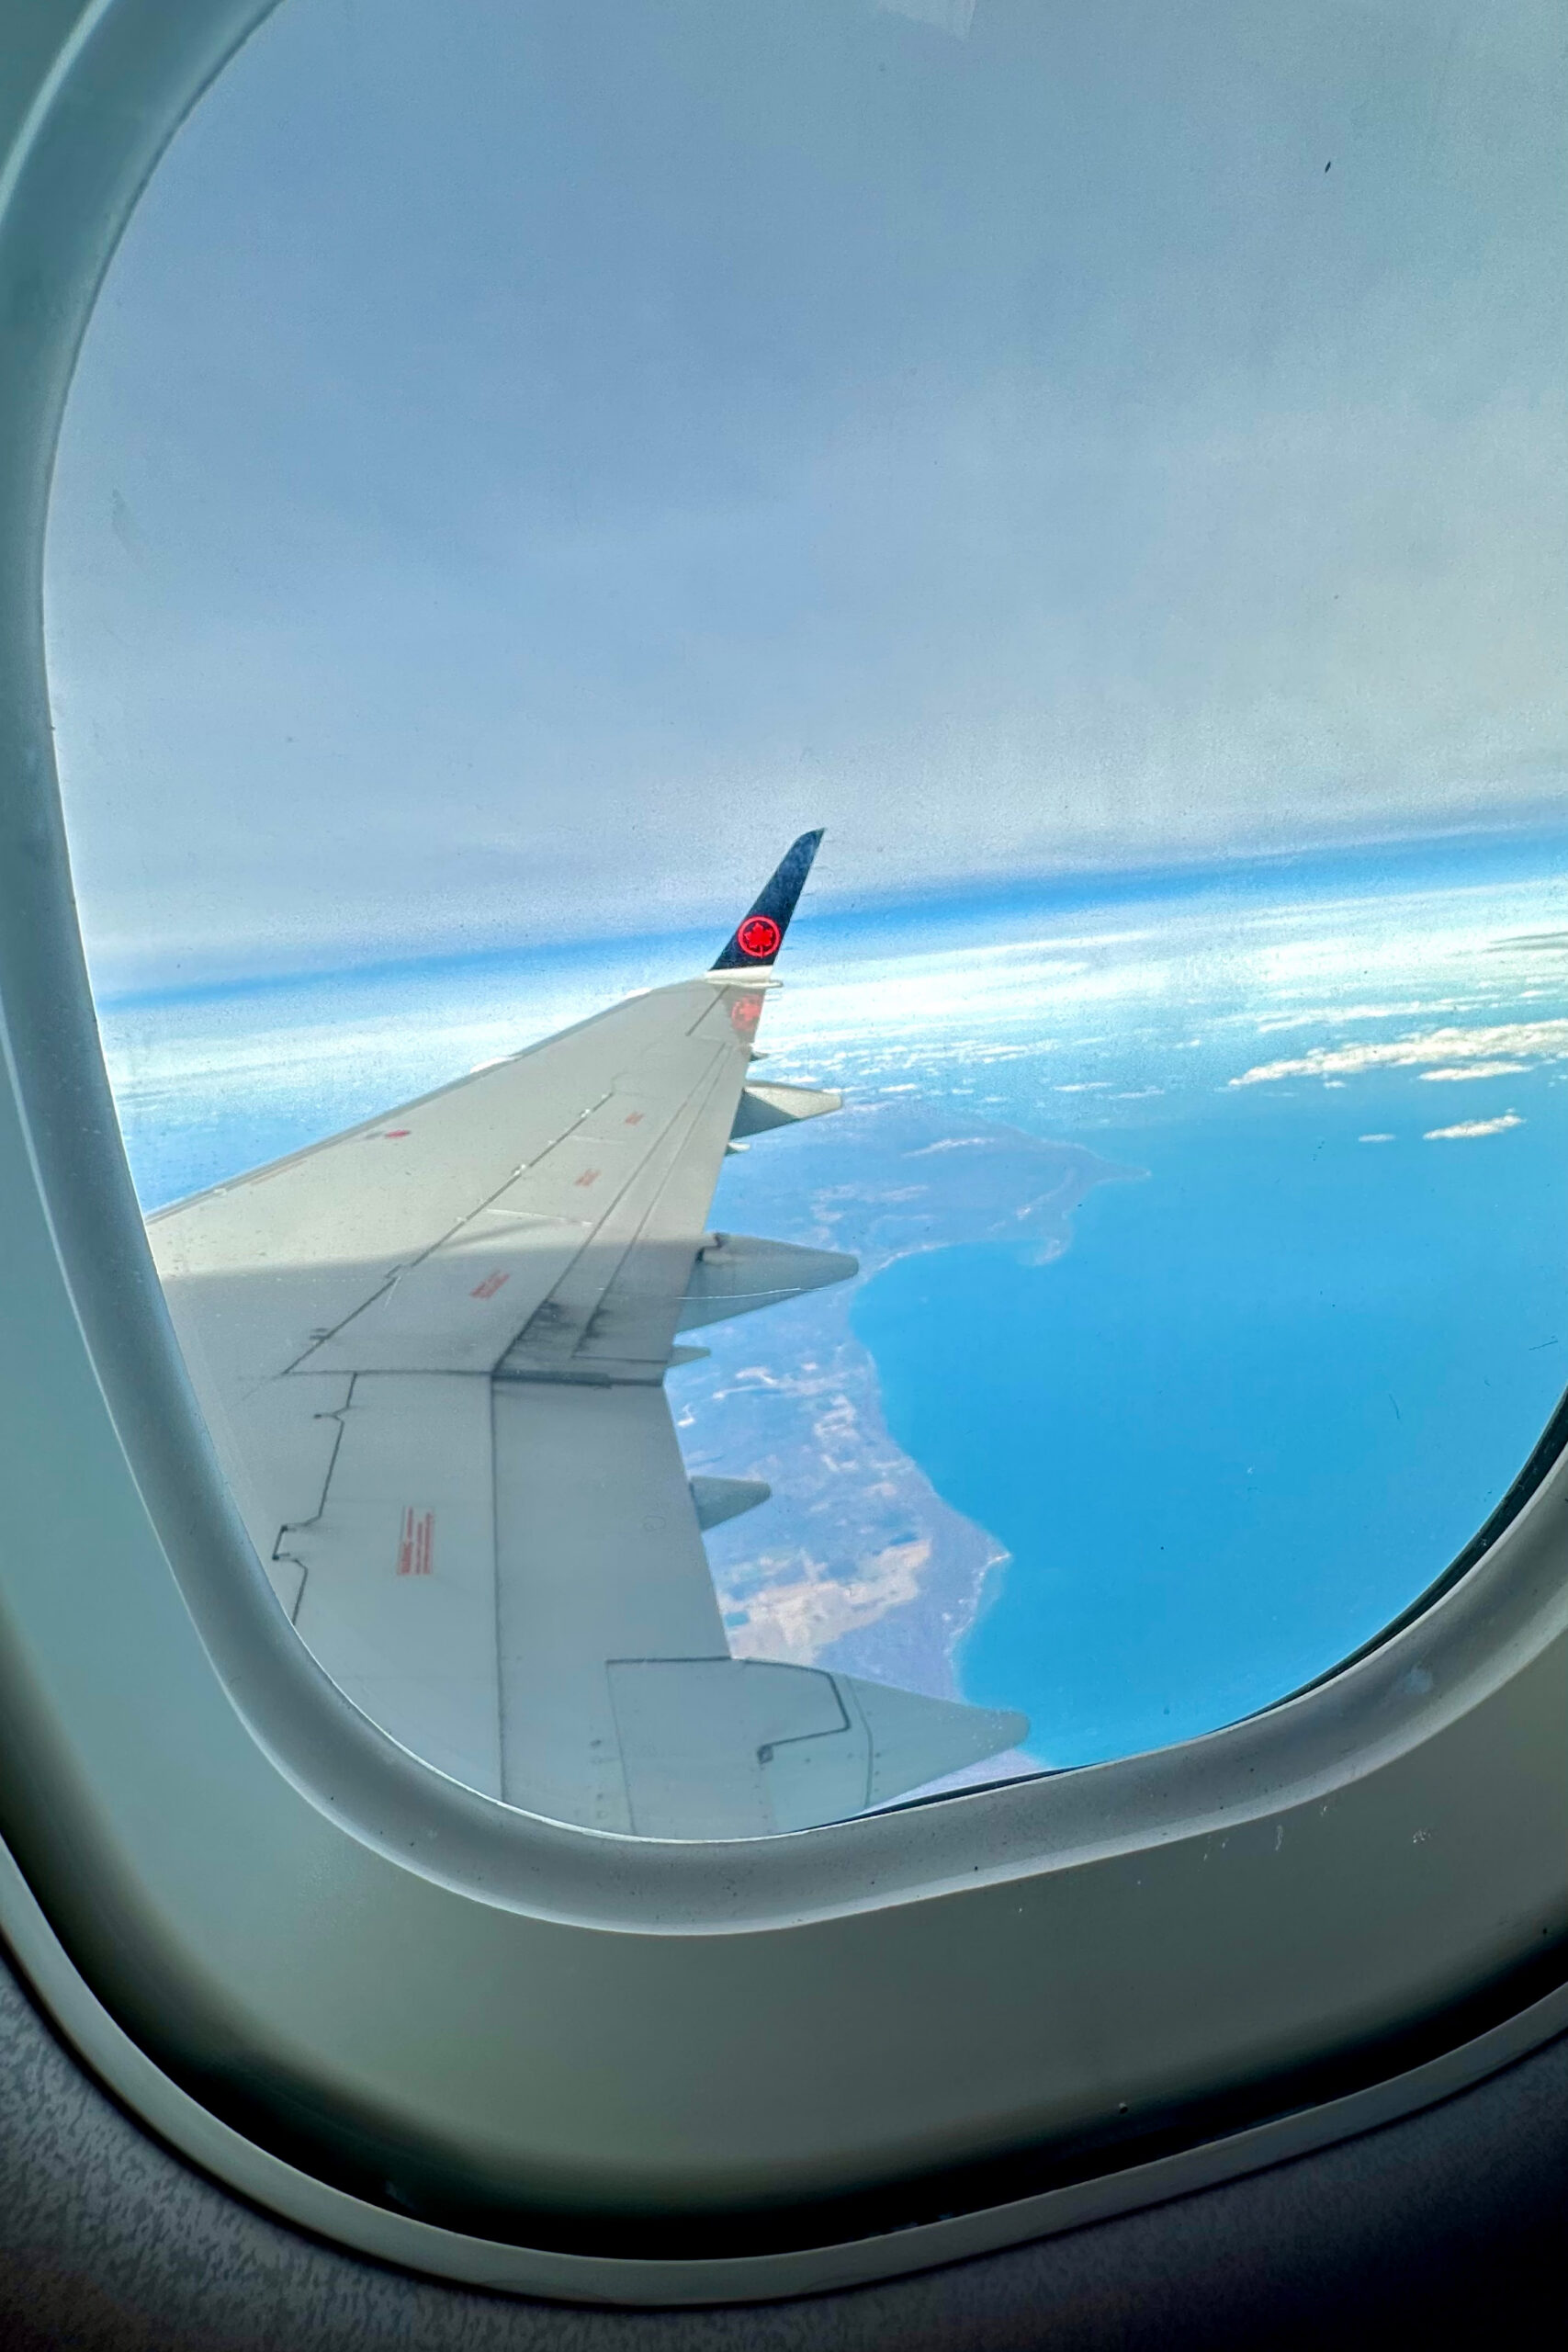
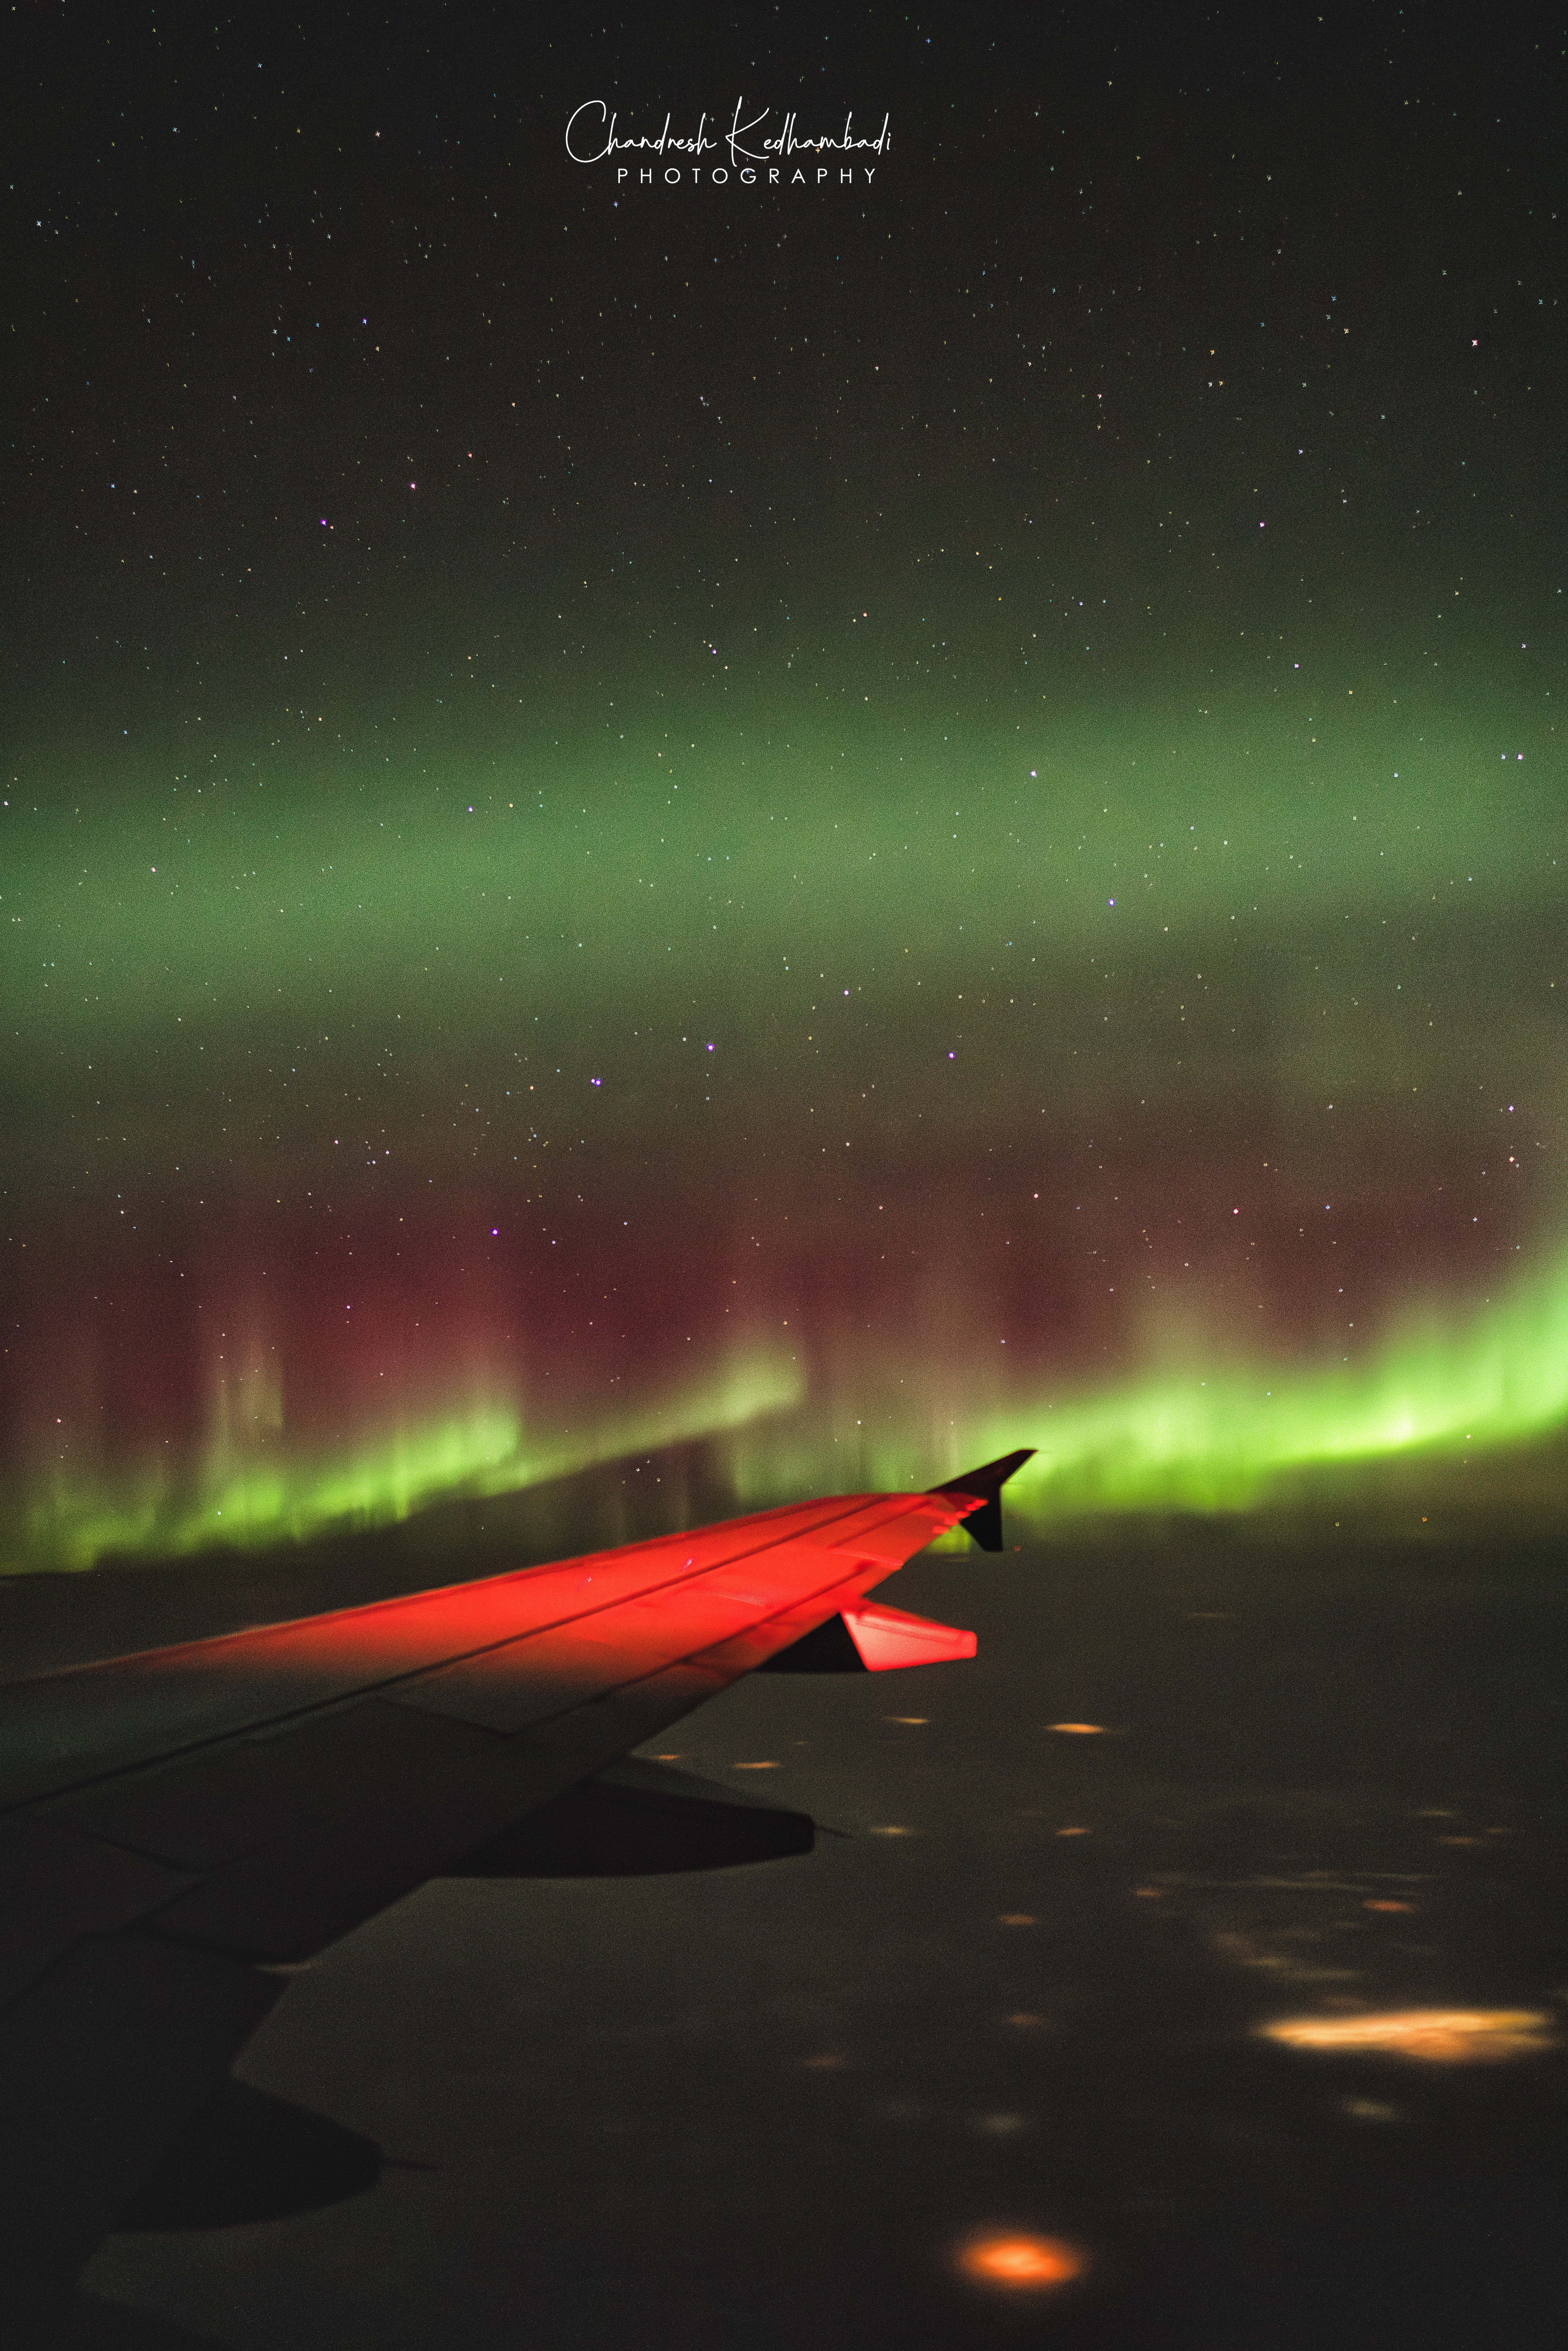
Example of good views from just behind the wing on westbound flights. Coastline or the aircraft wing itself can be used as a compositional leading line. Citylights add a sense of motion blur and perspective for photography compositions. Photos by Chandresh Kedhambadi
Seats just behind the wing offer the best vantage point, providing a clear view while minimizing engine obstruction and reducing vibration compared to seats near the tail. Over-wing and exit-row seats should be avoided, as their thicker, multi-layered window panes introduce additional distortion. Aircraft windows are triple-paned acrylic with noticeable curvature, making shooting angle critical, and proximity to the engines can introduce vibration, glare, and heat shimmer that degrade image quality. Positioning yourself behind the wing helps minimize these issues, allowing for cleaner, sharper aurora images. Additionally, the wing itself will work to enhance your composition.
Ideal gear for photographing outside the aircraft window – High ISO performance and ultra fast wide angle lens. Tripod a bonus
Once the seat was secured, my focus immediately shifted to gear and whether I had the right tools for what might unfold outside the window.
An ideal camera for shooting auroras from a plane is one with excellent high-ISO performance, strong dynamic range, and fast manual control, allowing quick adjustments in low light without hesitation. A fast wide-angle lens—ideally in the 14–24mm range with an f/1.8–f/2 aperture—is critical for capturing both the scale and motion of the aurora while keeping shutter speeds short on a moving aircraft.
Traditional tripods are impractical in a plane, so a compact travel solution such as a small tabletop tripod, window brace, or even a firm hand-held technique pressed gently against the window frame works best. In this environment, simplicity, speed, and stability matter more than a heavy kit—the goal is to be ready when the lights appear, because sometimes the moment rarely lasts long.
The gear I had in my camera bag was the full-frame mirrorless Sony A7R III and I had two lenses the Sony FE 12-24 f2.8 GM and Sony FE 24mm f1.4 GM. I was also lucky that I had my lightweight travel tripod attached to my camera bag and had not checked it in as I normally do.
Shooting aurora from an airplane with a smartphone is absolutely possible — but you have to work around reflections and low light limitations. Expect more noise levels when shooting with a smartphone. Although it’s a bit more work involved, best results are achieved by using either a DSLR/Mirrorless camera paired to a fast lens under manual settings.
Preparation and Set-up – Etiquette and Window Management
Upon boarding the aircraft, I quietly informed the flight attendant and the passengers seated around me that I planned to photograph the Northern Lights during the flight, reassuring them that any unusual movements or prolonged window-focused moments were entirely intentional. Being transparent helped set expectations and ensured everyone felt comfortable. From a legal and ethical standpoint, personal photography from an airplane window is permitted, but it is important to respect clear boundaries—crew areas, security-sensitive spaces, and other passengers should never be photographed without consent. While some airlines discourage the use of window-mounted attachments, gently resting a lens hood against the window to reduce reflections is generally acceptable. Clear communication, courtesy, and respect go a long way in making in-flight aurora photography a positive experience for everyone involved.

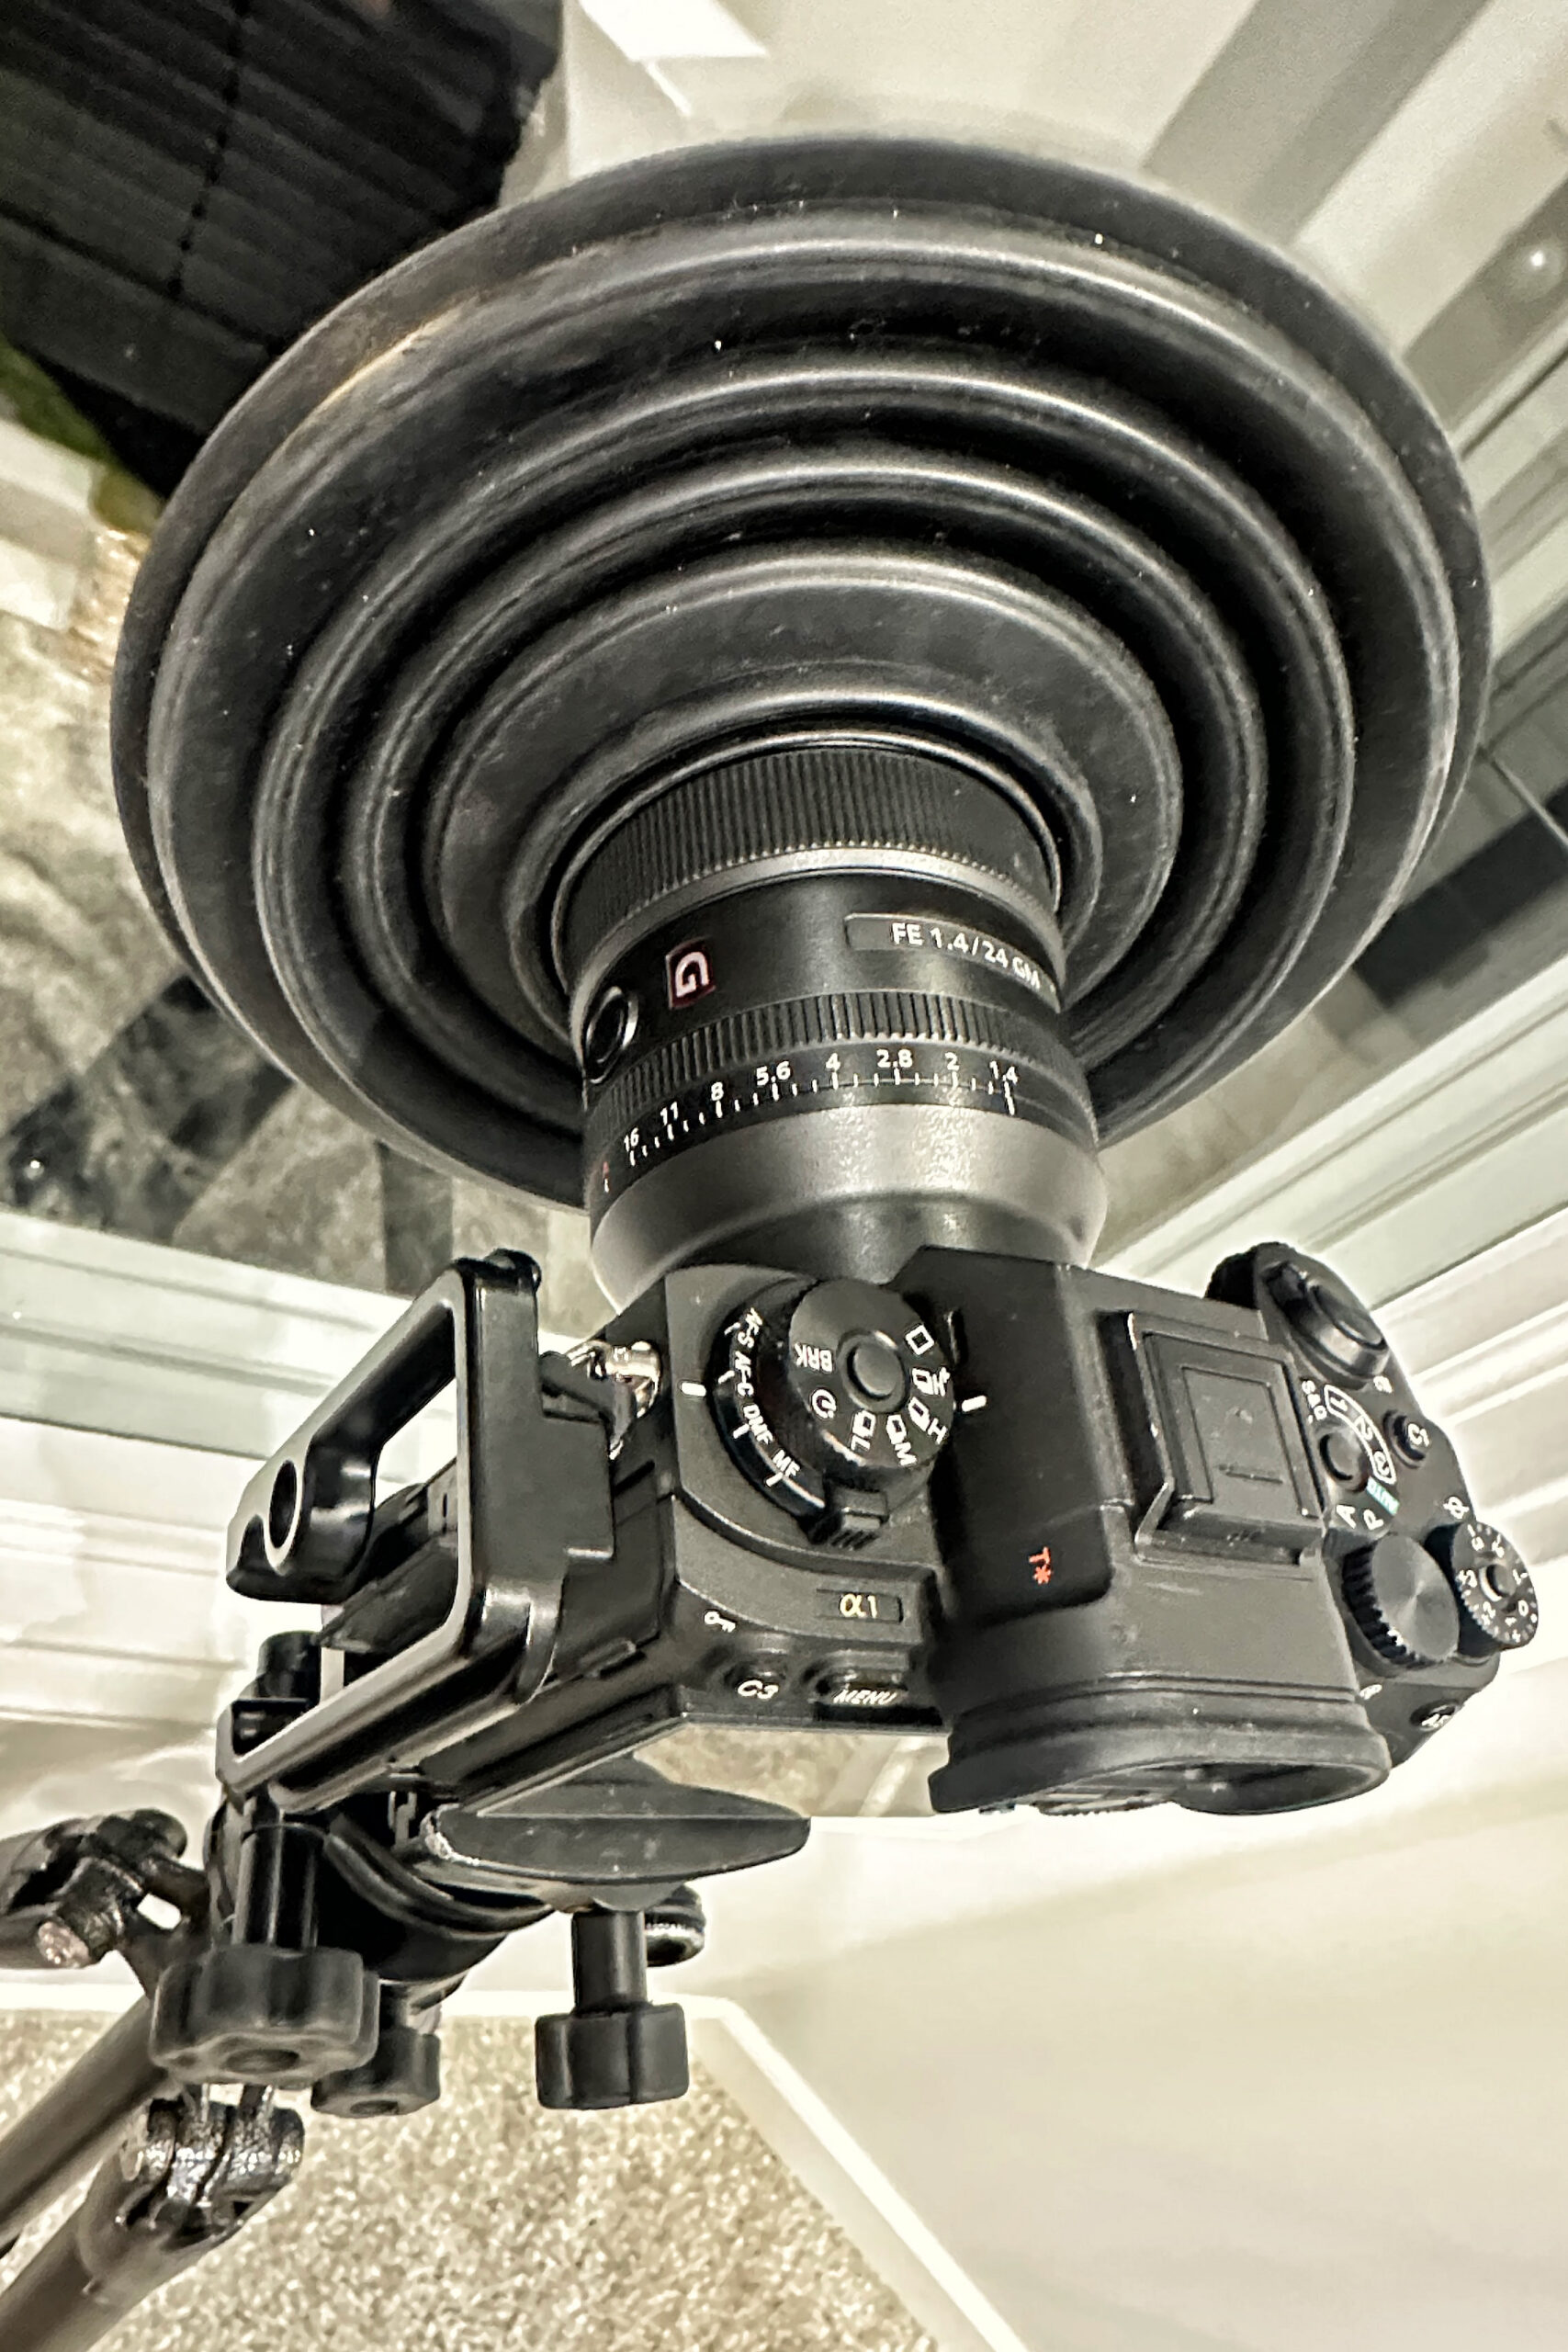
A camera lens hood attachment made from flexible rubber material is the best way to completely eliminate window glare. This lens hood works for any type of window photography and easily attaches to the front of the lens as shown. Care should be taken to make sure the focus ring is not disturbed during the attaching process and the diameter of the lens hood and lens matches. A lens hood can be purchased in most camera stores or online. Photo by Chandresh Kedhambadi
Before taking my seat, I made sure all essential gear was easily accessible, eliminating the need to disturb others or reach into the overhead bin once the lights appeared. Preparation was especially critical for managing the window—often the single biggest factor affecting image sharpness. I cleaned the window thoroughly using a microfiber cloth carried in my bag, then pressed the lens hood directly against the glass to stabilize the camera and eliminate interior reflections.
Shooting Through a Moving World – Surprisingly pictures turn out well
Somewhere between Minneapolis and the Canadian border, as we reached cruising altitude at 35,000 feet, the cabin lights dimmed and most passengers got ready to switch off for the night. At cruising altitude, the aircraft is still moving at over 800 kilometers per hour (500 mph). Add vibration, turbulence, and the subtle flex of the fuselage, and getting stability becomes a challenge. Outside my window, the familiar darkness of night stretched endlessly—only to be broken by a faint green arc emerging along the northern horizon. Then it strengthened, pulsing softly and the dance began against the curvature of the Earth.
Photographing the Northern Lights from the ground is demanding. Photographing them from a moving aircraft—through curved, triple-pane acrylic windows, at jet speed, with vibration and light pollution—requires equal parts preparation, restraint, and acceptance of imperfection. I turned off every source of cabin light—overhead lamp, seatback screen and any other source of light that I could. At night, reflections are your enemy, and darkness is your ally. I pressed the lens hood gently against the window—not to force it, but to stabilize it—creating a seal that eliminated reflections and absorbed micro-movements. I used the blanket and my jacket draped over my head and camera further blocked stray cabin light, turning my seat into a small, improvised darkroom.

Autofocus hunts endlessly in low-light aerial conditions, and one missed focus check can ruin an entire sequence. Manual focus was non-negotiable. I followed the same approach as I use on land, picked a star, used focus magnifier and dialled focus to ensure the star was tack sharp. To dial in the three critical camera settings—the exposure triangle, I tackled the aperture first—went wide open at f1.4 (Sony 24mm GM Lens). Then after a series of test shots at different exposures, I felt something less than a second was manageable given a bit of the turbulent weather at that particular instance. The exposure of 0.4 seconds seemed to work better at that moment. Thirdly, I bumped up my ISO steadily through a sequence of shots and found that 12,400 ISO was the high point before noise became prominent. The resultant shot is shown here and from then on I played around with different exposures and ISO levels to adapt to the aurora intensity and the turbulence in the aircraft. I shot in short bursts of 15-20 images set on the intervalometer to increase the odds that a few images would align perfectly with the aircraft’s micro-still moments.
These were the different settings that I played around with:
- Aperture : f1.4 — f/2.5
- ISO : 6400–12800
- Shutter : 1/20 to 3 seconds
- SteadyShot (IBIS – In-body-image-stabillization)
- Lens Stabilization on
Key Lessons Learned from 35,000 feet for Aerial Aurora Photography
This is not photography that allows perfection. Windows are scratched or dirty from outside. Vibration is constant. Noise creeps into every shadow. But the imperfections are part of the truth of the experience. You are not standing still. You are moving through space while light dances around you. Your experience reinforces that outcomes are driven far more by preparation, timing, and discipline than by equipment specifications. Direction of travel, seat orientation, and being ready at the right moment consistently outweigh sensor resolution or megapixel count. In extreme environments such as aircraft cabins, manual control is non-negotiable—automation introduces lag, focus errors, and exposure inconsistencies that cost fleeting opportunities. Importantly, some of the strongest images emerge unexpectedly, rewarding readiness rather than rigid expectations. From a technical execution standpoint, stability and timing are paramount. Bracing the camera against the window frame rather than the glass alone, shooting at cruise altitude during smooth air, and avoiding turbulence or descent phases materially improves sharpness. Electronic shutter introduces rolling distortion and should remain off, while in-body-image-stabilization (IBIS) and lens stabilization engaged did produce favourable outcomes.
Cabin light discipline is critical—any oversight immediately degrades contrast and color fidelity. Using a lens hood such as the one shown above produced excellent images and eliminated all cabin light imperfections. I highly recommend getting one of these if you are planning for aircraft photography or any form of window photography in general.
Compositionally, success comes from intentional framing rather than novelty. Natural leading elements—cloud bands, coastlines, and river systems—anchor images and add scale. The aircraft wing also became a leading line in my composition and I was quite happy with that composition. For auroras, the strongest images emphasize Earth’s curvature, horizon glow, and atmospheric layers, while actively minimizing city light spill. A subtle downward shooting angle consistently reduces window-induced distortion compared to shooting straight out. This is evident in my first few images where the stars seem a tad bit out of focus, which I believe to be due to the angle and the window distortion in effect.
An aurora-style airline window photography setup translates exceptionally well to shooting through any interior window—particularly for cityscapes at night. By positioning the lens flush against the glass and using a rubber filter lens hood, you create a perfect light seal that eliminates interior reflections and glare, dramatically improving contrast and colour fidelity. The flexible rubber hood conforms to uneven window surfaces, blocks stray ambient light from the room, and stabilizes the lens for sharper long exposures. This simple configuration effectively turns any window into a controlled and accessible shooting portal, making it ideal for capturing clean, reflection-free urban skylines from inside buildings, hotels, or observation decks for scientific purposes.
Concluding
Finally, your mistakes underline common failure modes in this niche: wide-angle work through scratched windows, autofocus hunting in low-light conditions, shutter speeds too slow for jet vibration, missed cabin-light controls, are all part of the challenge and the euphoric feeling of a special souvenir from a flight and reminder that the aurora does not exist solely where we plan to find it. Sometimes, it follows you home. And perhaps that is the greatest gift of aerial aurora photography—not the images themselves, but the reminder that wonder does not end when the chase does. Sometimes, it simply changes altitude.
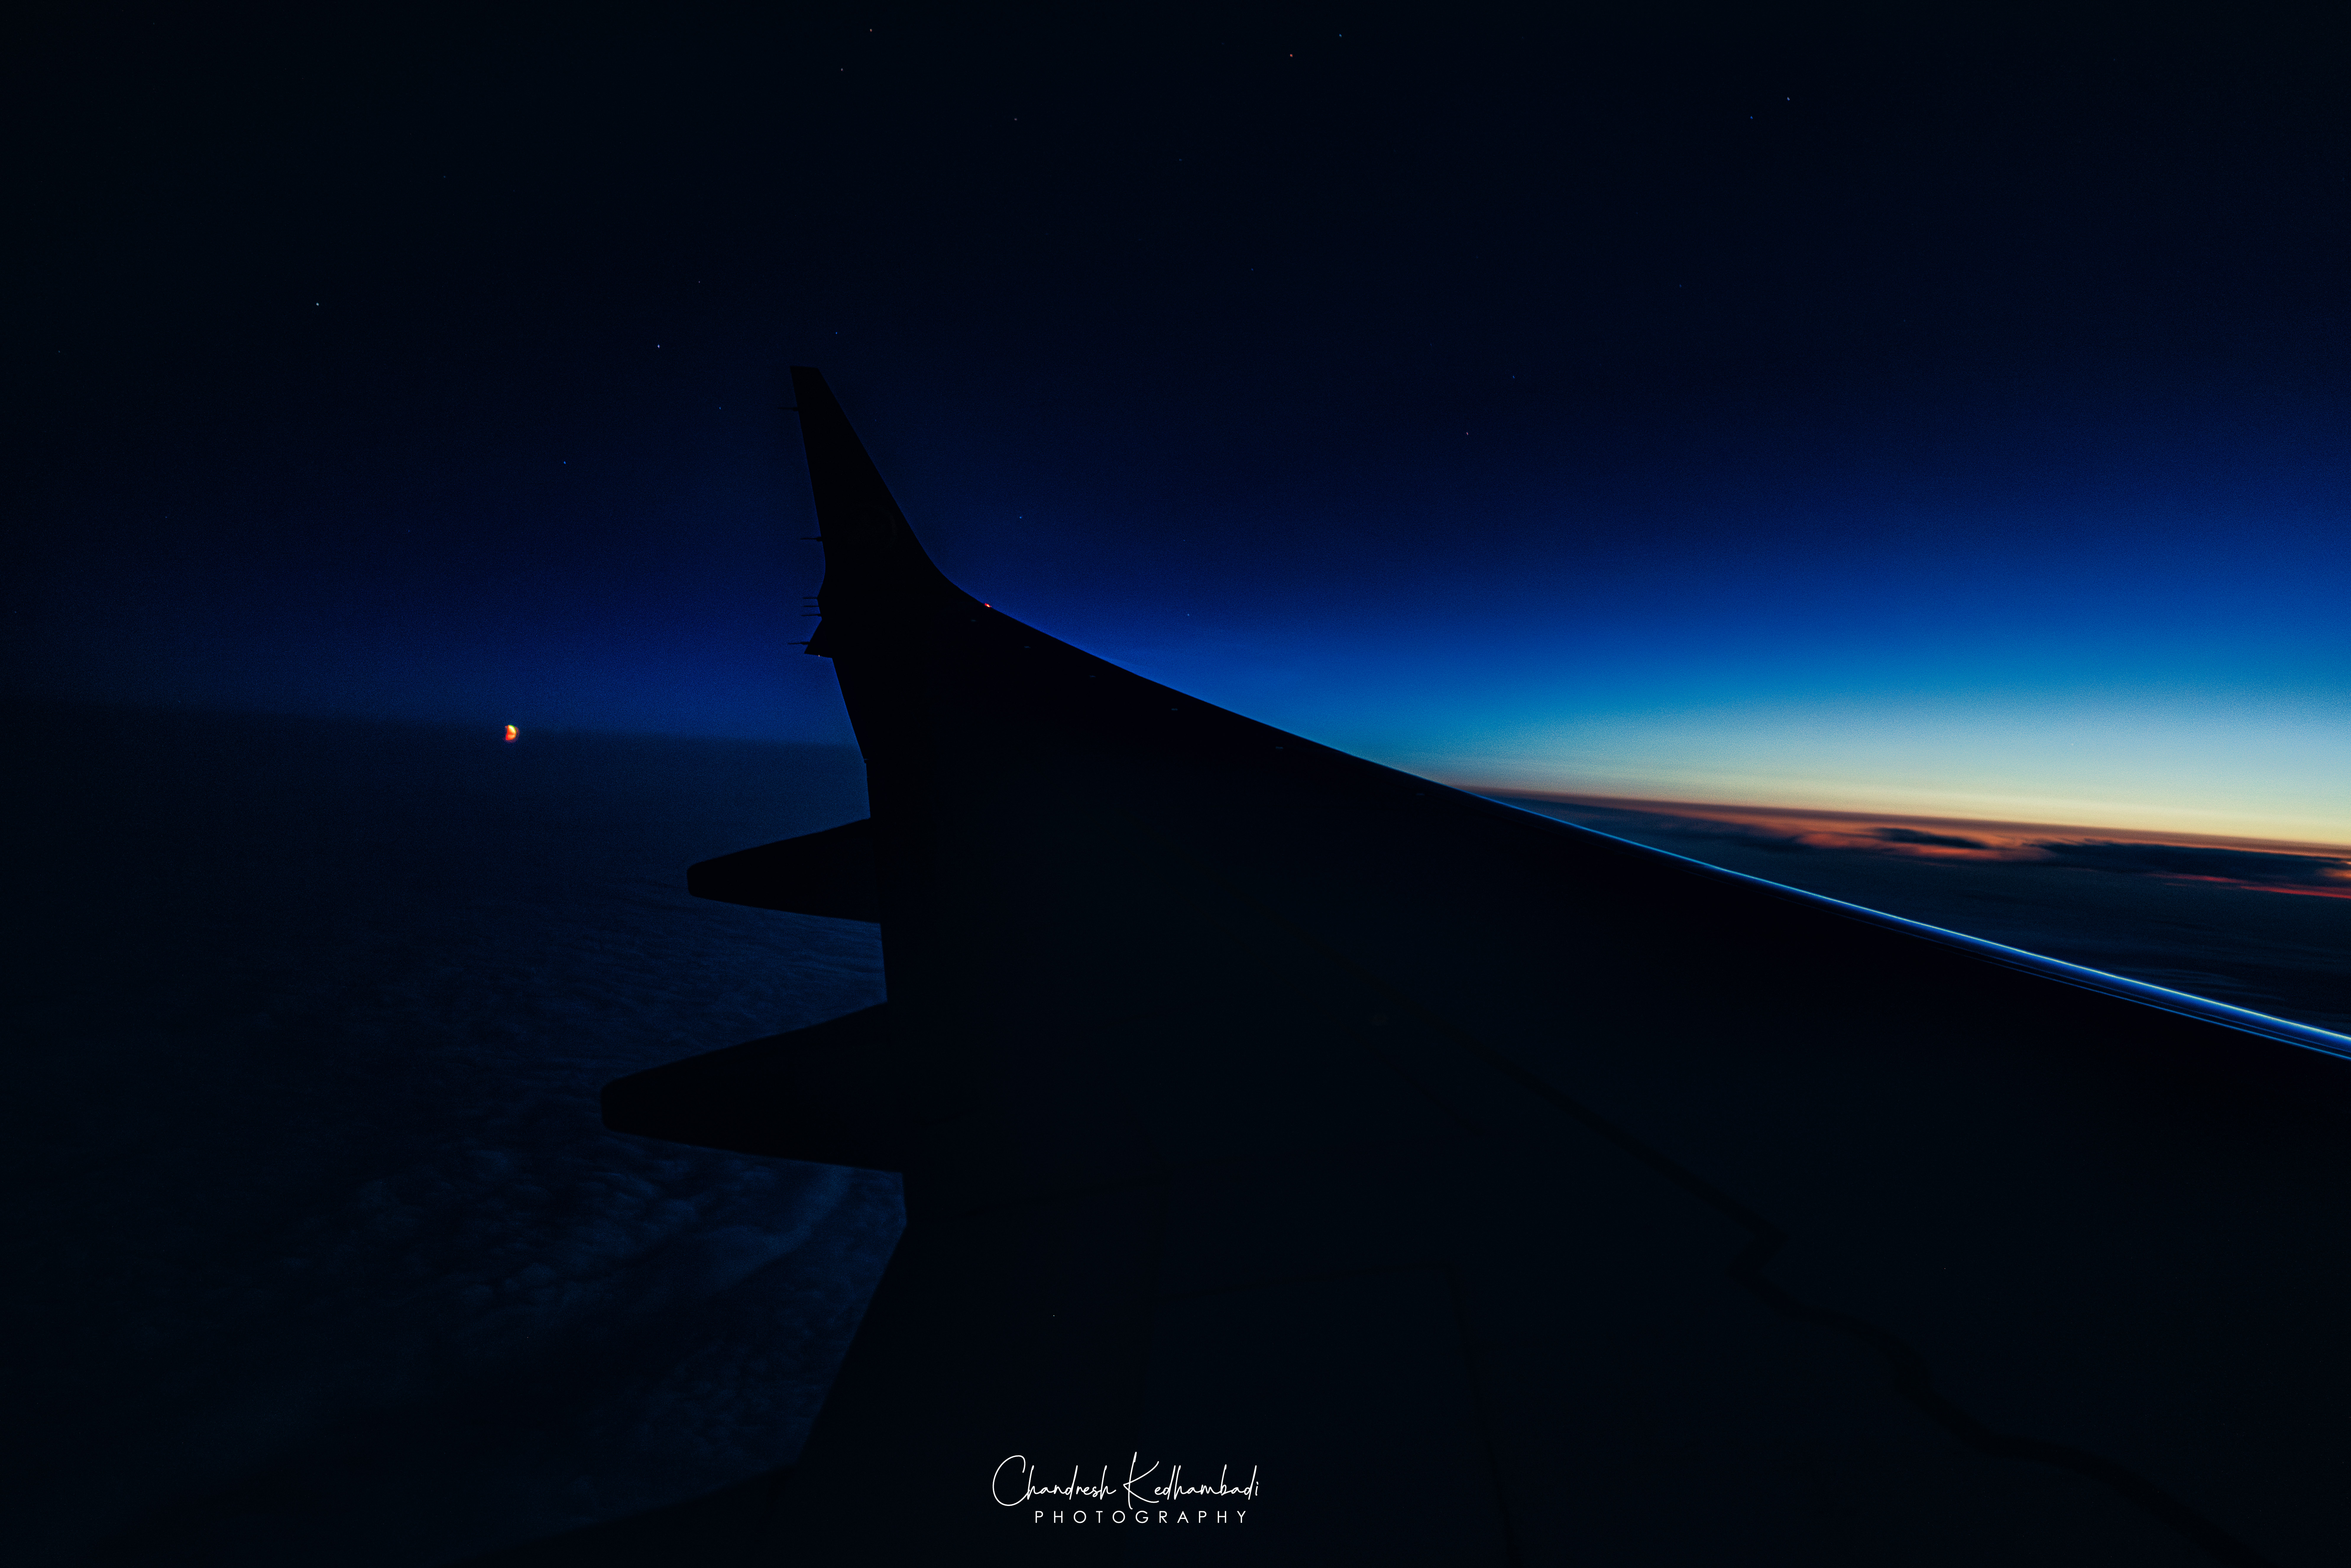
There is a rare kind of euphoria that comes from witnessing the northern lights from an airplane—an awareness that you are suspended between Earth and space, watching a phenomenon few ever see from this perspective. As the aurora dances, stretched across the curvature of the planet, time seems to compress into a series of breath-held moments where preparation gives way to pure instinct. Then, almost imperceptibly, the night begins to loosen its grip. The green arcs soften, the reds retreat, and the first hint of sunrise emerges along the horizon, washing the atmosphere in pale gold and indigo.
In that transition, as darkness yields to daylight and the aurora fades into memory, there is a profound sense of privilege—of having witnessed a fleeting convergence of physics, geography, and light that exists for only a handful of minutes, and only for those looking in exactly the right direction at exactly the right time.